Showing posts with label finished object. Show all posts

Monday, December 24, 2007

Is this thing on?

I wasn't sure Blogger would even let me back in after my egregious blog absence. It seems my last post was almost 4 months ago (I'm sneaking in 2 days shy of 4 months...). In the meantime...

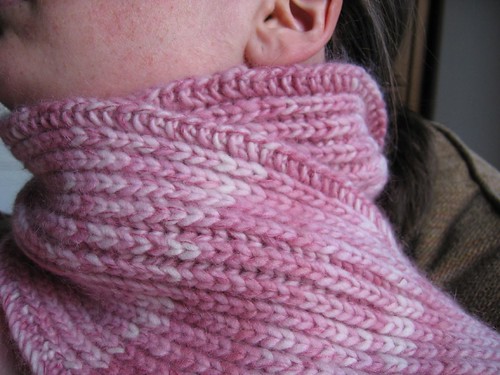
I finished my pink scarf:

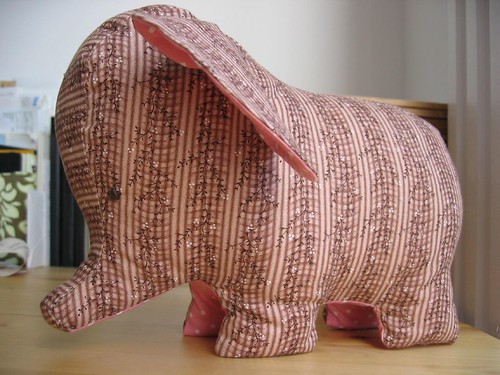
I sewed an elephant for Baby J:

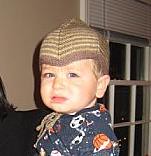
New hat for Baby B (you can see he loved it):

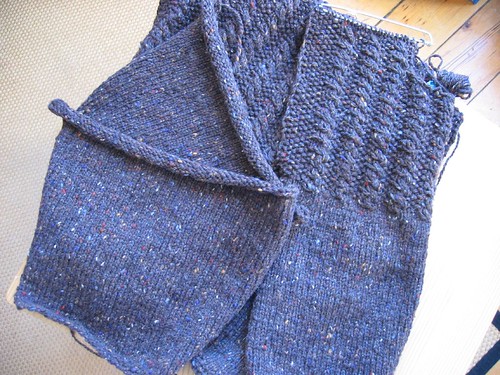
And nearing the finish line on a sweater for him too:

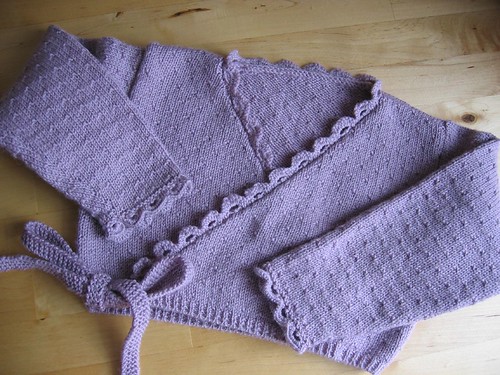
Sweater for new Baby K:

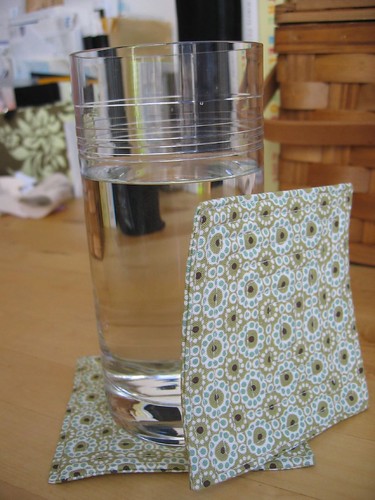
And coasters:

Phew.

The truth is, though, I've been working on something else really big... a person (Two Potato, as C calls him)! That's right, we're having a kid at the beginning of May. While I was spared morning sickness and crippling fatigue, the bean sapped me of all creative energy and it only returned a few weeks ago. Now I'm playing catch-up.

Have happy holidays everyone! Hopefully it won't be another 4 months until you hear from me again!

Monday, May 07, 2007

Shut eye

Last night while I was supposed to be reviewing a hedge fund agreement (yes, it was Sunday) I thought my time would really be better spent sewing an eye mask for my upcoming vacation. The prospect of vacation is pretty much the only thing getting me through these days, to the point where I'm really looking forward to the red-eye flight to catch up on some sleep sans blackberry. Now that, my friends, is a sad state of affairs.


On red-eyes I am generally super aggressive about getting to sleep, asap. This means Tylenol PM as soon as I sit down, bandana tied around my eyes, earplugs and the death stare to any flight attendant who dares ask if I want a drink or petrified dinner. When I saw this eye mask in In Stitches, it had to be mine. So I dragged out the much-neglected sewing machine and set to work. I guess lack of practice pays off, because there was no seam ripping! I'm very pleased with the finished product. I'm not generally a pink person but when I saw these fat quarters at Purl, I was smitten. My topstitching still needs some work but it's overall acceptable given the 4 layers of quilt batting I had to work with. Yes, the finished product looks a little like quilted aviators, but I will be the chicest chica in coach with these babies. Vacation - bring it on!

Thursday, February 22, 2007

Cowly

Delicious: that's what I'd like to say about my fab new cowl. There was a time when I thought these amputated turtlenecks were weird but I am a convert. I love my cowl.


Pattern: Cowl from Last Minute Knitted Gifts.
Materials: Cashmere sock yarn from Hipknits, purchased at Loop in London, size 4 circular Addi Natura needles.
Modifications: Yarn substitution.

This is the perfect transition scarf when you don't need your neck fully swaddled but want a little something to keep out the wind.

And just in case I haven't raved enough about the yarn, let me say it again: love the color, love the hand, love the post-wash feel of this yarn. Plus, it goes on and on and on - look at this wad I have left! Does a girl need two cowls? She just might...

Monday, February 19, 2007

Patchwork Pouch

In addition to the desktop organizer I whipped up this little number over the weekend. I was inspired by these beauties over at Hip to Piece Squares (a new blog find for me, and I am totally enamoured).


After all the fussing with the desktop organizer, I decided to throw caution to the wind and do some haphazard piecing with scraps I had lying around. So with no planning, I just cut, sew, cut, sew and on and on. It was really liberating! I pieced and pieced until I had something about 12" x 6" and then cut it in half. I then quilted both pieces, again in a totally unplanned fashion while also practicing some topstitching techniques (how close could I get to the seam without falling in?). Finally, I assembled the pouch using the basic pattern from popular how-to-install-a-zipper tutorials you can find on twelve22 and u-handbag (we also made one of these in my intro machine sewing class under Liesl's expert tutelage).

I love the result! I am especially proud of the little zipper stops along the top. When I make another quilted pouch I'll make the lining a little smaller than the outside pieces; even though the quilt batting is lightweight it takes up space inside, resulting in a baggy lining. But otherwise, I love this little guy!

Sunday, February 18, 2007

Straightening up

This weekend I finally set to assembling my desktop organizer from Amy Butler's In Stitches. I had previously cut all the pieces and thought I had everything I needed. I was planning to use heavyweight fusible interfacing as the stiffening agent, although Amy calls for her beloved Timtex interfacing (seriously, does this lady own stock in the company? It's used in so many of her patterns).

After not following my cardinal rule of reading all of the instructions before commencing, I set off only to realize my "heavyweight" interfacing was not going to do the trick - not only did I not iron it on at the right time because the instructions did not advise ironing (rightly so, as Timtex is not ironed), but there was no way it was going to be stiff enough to result in a box of any kind. Crisis ensued, but was resolved by a quick trip to Brooklyn General Store which carries loads of fun fabric, yarn and roving, but also all materials called for in Miss Amy's patterns. Naturally, ample supplies of Timtex were in the house. I'm so glad I went to find it because it is way different from the heavyweight fusible interfacing - it's almost like very light styrofoam-meets-fabric versus the comparatively mild stiffening produced by the ironed interfacing. All was looking very nice and good: pre-Timtex crisis I had assembled the inner and outer shells of the organizer, I had Timtex, what bad could happen?

Now, I have read of the turmoils of assembling Miss Amy's Weekender Bag, which also uses Timtex, but I figured the desk organizer was just a bitty little thing with far less muss and fuss. I'm certain this thing doesn't compare to the Weekender, but make no mistake, Timtex is a workout! There was no small amount of wrangling to get the piece fed through the machine properly. In addition, turning Timtex inside out on multiple occasions is a great way to (a) build up your biceps and (b) poke yourself in the eye.

Despite the fact that the pattern pieces were cut to the perfect size and I was super careful with my seam allowances, it still didn't come together precisely right. For starters, the inside lining is all floppity in there - it's too big, because it's cut and sewn to the same dimensions as the outside, yet it's occupying less space since it's not stretched across Timtex and another layer of heavyweight fabric. In addition, somehow I didn't have the 3/8" of outer fabric hanging over the top of the Timtex inner shell when that was put together. Oh, and my topstitching is super wonky and the whole thing kind of bows out at the sides. And I couldn't figure out how to put the handles on without injury to myself.

However, despite its flaws and imperfections, my desktop organizer has corralled and camouflaged many of the bits and bobs wandering around my desk. Plus, packed with stuff it seems to sit up a little straighter. In fact, as I sit here looking at it I think it's not half bad... but don't look for me making another one anytime soon!

Sunday, February 04, 2007

I can see clearly now

I finished my eyeglass sleeve and after various challenges, I'm very pleased with the result.

Pattern: My own.
Materials: Bits of two fat quarters. Lightweight quilt batting. 25mm bias tape maker. All materials from Purl Patchwork.

My initial plan was to fold my long piece of quilted fabric together lengthwise and bind the side and top edges in bias tape. Unfortunately, this resulted in a really messy edge and I couldn't figure out how to miter the corners or make the bottom of the long edges look neat. I wound up with a chicken-and-the-egg problem where I would tuck one thing, creating a raw edge at one spot and then I'd instead tuck the other thing in creating the reverse of the initial problem. Hard to explain, but trust me, it was a mess.

My solution was to edge all the way around the piece while it was flat and then ladder stitch up the sides. This resulted in a very neat finish. My sleeve will be the perfect way to tote my reading glasses around the office!


This project was also a great chance to continue practicing my quilt binding technique without committing to a whole quilt. I again used the one-step technique in The Modern Quilt Workshop. This time it came out much neater than my double-pointed needle case. I learned from the ladies at Purl that I needed to pin the edging down every inch or so and I learned from my sewing machine that I should wait until the pin slid right up under the presser foot (but BEFORE it got up to the needle - no sewing over pins!!) to remove the pin, which resulted in the fabric staying where it was meant to be. There are definitely some imperfections, but I can see how the technique will keep improving.

I'm committing today to some stockinette and to dreaming up my next sewing project.

Tuesday, January 30, 2007

Where's that metrocard?

I have a nasty habit of misplacing my slippery little metrocard. I prefer not to keep it in my wallet because I don't like excavating and opening my wallet in the middle of the subway station. So, I usually keep the metrocard in an inside pocket of whatever bag I'm carrying. Then I wind up fumbling around like a madwoman the turnstile while some guy in a suit barks at me to swipe the card or step aside. I used to have a handy plastic sleeve for my card... but I lost it.


Inspired by my old sleeve, I wanted to make a little slipcover for my card to give it some more substance in the pocket and make it easier to find when I'm groping around and suits are hollering at me.
Behold, the metrocard sleeve. You might recognize the fabric from my DPN case. I measured my metrocard and doubled the length plus a 1/4" on all sides. I cut out two pieces of fabric and a piece of heavyweight interfacing. I ironed one piece of fabric to the interfacing. I then sewed wrong sides together, turned things inside out, folded the whole mess in half and sewed up the side seams right up close to the edge. I'm particularly proud of the little notch in the top - it's the first time I've sewn anything curved on my machine! Ok, so I used the needle wheel to hand stitch each stitch. But it's curved, so there.

Sunday, January 28, 2007

Retail therapy

Yesterday my friend C and I hit Manhattan with a major shopping list. Many fun things were purchased.

The first stop was School Products, where C snatched up two pounds (!!) of gorgeous charcoal gray cashmere merino on a giant cone to knit herself a Flicka. It promises to be fantastic. I also picked up another hank of big fat cashmere to make a hat for my friend V. I used this yarn on my so-called udon hat (which I have yet to photograph). I love that hat, but I think I'll go down a needle size because the stitch turned out a little open, it's a wee bit big and most importantly, my dear V has a little tiny peanut head.

We then headed down to Purl Patchwork where I purchased various unphotogenic bits and bobs including lightweight quilt batting, heavyweight fusible interfacing, cream cotton and sewing machine needles. In addition, somehow I am incapable of leaving there without one or two colorful scraps of fabric and this trip was no different.

It was then on to Purl. I saw this beautiful pink garter stitch scarf in Malabrigo and was smitten. I'm not ordinarily a pink person but I just loved that scarf and when I saw some Malabrigo on eBay, home it came. Unfortunately, it arrived a bit more cotton candy than anticipated. No matter, a little rose mohair should do the trick. I'll hold them together, the mohair will melt into the Malabrigo and my pink will be divine.

While at Purl I also picked up some Fibre Company Terra for my mother in law (hi mom!). She is going to be making a mobius wrap thingum with some Noro Silk Garden I have left over from my Lady Eleanor wrap. The Noro colorway is discontinued #34. Bizarrely, this colorway has elements that blend almost seamlessly into a number of Terra colors. I chose one green/purple that almost disappears into the Noro and one wine/purple to bring out the purple in the Noro and add a reddish element.

Speaking of Lady Eleanor, here she is. I finished this last summer and she stays in my overly air-conditioned office where I rarely have a camera handy to photograph her. The pattern is from Scarf Style by Pam Allen. I highly recommend this project! I get many compliments on her.

I will share some photos of works in progress tomorrow, including two small sewing projects. On the knitting front, things are progressing, although it seems I've signed myself into stockinette hell for the foreseeable future.

Sunday, January 21, 2007

Double Pointed Needle Case

My double-pointed needles needed a home, so I designed and executed this double-pointed needle case and it came out better than I could have imagined! I was initially going to make the case over here, but I got befuddled thinking about it and was forced to set out on my own.


My case has an inner pocket with appropriately-sized slots for all of my DPNs and some extra spaces for sizes I will likely acquire one day. The pocket and back are lined with lightweight interfacing to give them a little substance. The top of the pocket and the entire outer edge are trimmed with bias edging (although not cut on the bias). I made the whole thing 10" high because while most of my needles are 6" long, a few sets are 8" and this is an equal opportunity case. All of the fabric, thread and the button is from Purl, bien sur.

If anyone is interested in trying it themselves, here's what I did. Click on any picture and it will get bigger.

Ingredients
You will need fabric for the pocket, inner lining, outer lining and edging for both the inner pocket and the outer edge. You can choose any combination you like. You will also need some fusible interfacing. Cut fabric as follows:

Inner pocket:
Two pieces, each 5.5" x 15.25"
One piece of fusible interfacing, 5.5" x 15.25"
One piece for bias edging, 2" x 15.25"

Inner lining:

One piece, 10" x 15.25"

Outside:

One piece, 10" x 15.25"
One piece of fusible interfacing, 10" x 15.25"
Pieces of fabric 2" wide totalling about 57" in length (I did this by cutting four 2" x 15" strips)

Matching thread, or not matching, if you are me.

You will also need a button and a scrap of fabric about 1" by 5" for the closure. You could alternatively use ribbon or elastic or yarn or anything else your little heart desires.

Finally, I used muslin to make a template for myself. You could use some scrap of fabric or paper as well.

How to
  1. Wash and iron your fabric like a good little seamstress. Cut out your pieces as described above, being sure to stop and admire your handiwork.

  2. Iron your interfacing to the wrong side of one piece of the pocket and to the wrong size of the outside fabric. Set aside the outside fabric.

  3. To make the bias edging for the top edge of the inner pocket, I would recommend using a bias tape maker. You don't have one you say? Buy one. I'll wait...

    Alright fine, if you don't have one, you can still play but it's less fun. Fold your 2" strip in half lengthwise with the wrong sides together, so it's 1" x 15.25". Iron the crease. Then, open it up and fold both long raw edges in toward the center crease and iron these down. Now, fold the thing again lengthwise and iron. You now have a 1/2 x 15.25" strip with one folded edge and the raw edges folded in toward the middle.


  4. Grab both pieces of fabric for your pocket and the edging you just made. Lay the piece of the pocket with the interfacing right side down so the interfacing is up. Lay the other piece of pocket on top with the wrong side down (now the interfacing is sandwiched between two pieces of fabric with the right sides out). Then take your bias edge and tuck the top edge of the pocket into the opening. Pin this into place. Go forth to the sewing machine and top stitch 1/8" in from the open edge of the trim.

  5. Alternative #1: Custom-sized pockets. You can use this approach if you want to customize your case for your repertoire of needles. The muslin (or paper or other scrap fabric or whatever) will be used to make a guide for how far apart to stitch your pockets. First, use a pencil to make a line 1/2" in from the left edge of the muslin. This indicates where the edging will be. Then, line a book or ruler edge along this line and hold it firm. Take your first set of DPNs and snuggle your needles up against that edge, keeping them all flat on the table. Make a pencil mark on the other side of the needles (see picture if this makes no sense). Continue to do this along the length of the muslin, shuffling the book/ruler along and lining it up with your last mark and moving up a needle size each time. You can approximate the distance if you don't have a set of needles in a particular size but think you might one day need space for them. For example, I don't have 000s, 4s, 8s, 10s or 10.5s, so I approximated the pocket size for these sets.

    Alternative #2: My pockets. If you can't deal with this and just want a case that will fit sizes 000s through 11s, skip the above and make the following hash marks on the front of your inner pocket. First, make the line 1/2" in from the left edge because you will still have an edging. Then, measuring from the 1/2" mark, make hash marks at the bottom edge at 1/2", 1", 1-5/8", 2-1/4", 3", 3-13/16", 4-3/4", 5-11/16", 6-3/4", 7-7/8", 9-1/8", 10.5", 11.5", 12-5/8" and 14-3/8". You will have a little more than 1/2" left hanging out at the end, but this can be trimmed later. I know this seems insanely precise, what with the 16th of an inch and all, but I wanted a really snug fit for the needles.


  6. Pin the outer pocket to the right side of the inner lining, lining up the raw bottom edges and being sure your hash marks are face up. Machine baste a 3/8" seam around the edge of the pocket to hold it in place.

  7. Using the thread of your choice (I used one that blended into the color of the pocket), stitch a seam 1/2" from the left edge of the pocket. Backstitch at the start and finish of this and every seam. Then, using your muslin as a guide and marking the next seam (or just moving over to the next hash mark if that's your style), stitch a seam again down the pocket. Continue seaming along until you've done all of your pockets. I was anal and checked my needles in each pocket as I went along.


  8. When you are finished with all of the pocket-making, trim the right edge of your fabric sandwich to a 1/2" seam allowance.

  9. Retrieve your outside fabric (it's the one stuck to the interfacing) and put it right-side down on the table. Put your inside lining-pocket ensemble right-side up on top of this, so the interfacing is sandwiched in the middle. Pin it all together and baste a 3/8" seam around. If you are really nuts like me, you can pick out the basting around the pocket bottom.

  10. If you are using ribbon, yarn or some other creative closure, you can skip this step. Otherwise, take your little 1" x 5" scrap of fabric and follow the bias edging process in step 3 (without the bias edge maker) so that you have a skinny little strip. Try not to burn your fingers on the iron holding the thing in place as you press. Return to the sewing machine and, with great patience, sew about a 1/8" from the open edge. Then return to your ironing board. Fold the strip in half and press a light crease. Open up the strip again and fold each end perpendicular to the strip and matching the edge along this middle crease. Press more aggressively in this shape. I think if you look at the picture it will make some sense, hopefully. Email me if not.

  11. The bias edging for the outside edge is prepared the same way as for the inner pocket, so go do that (you can see excellent instructions here for how to link the short lengths of 2" fabric together). Attach the bias edging using your method of choice. I used the one-step technique in The Modern Quilt Workshop. Another method is the one described at Heather Bailey's (this is sort of the way I did the edging on my potholders, although following the instructions in In Stitches). Now, I don't know enough about quilting to know whether these are proprietary ways to do do things, so I don't feel comfortable reiterating them here for copyright reasons. But, if you don't want to buy things, Heather Bailey's approach is easy and free (and actually produces a neater result than my method, although I'm sure if I did a better job my way works fine too). Whatever your approach, be sure to pin your closure under the bias edging at the midpoint on the front of your roll.


  12. You are almost done! Put your needles in and roll or fold the case however you like. I chose to roll, but could just as easily have folded in quarters or thirds. Pull your closure loop until it's taught and use a pencil or fabric marker to put a dot inside the end of the taught loop to mark where to sew your button. Sew on said button and voila! A custom case for your precious DPNs. This could be easily adapted for straight needles or crochet hooks too by varying the height and using the muslin technique to determine the width of each pocket. I leave it to you to go forth and be creative. Enjoy!

Please let me know if you have any questions or suggestions - this is my first time writing up a tutorial so while it makes perfect sense to me, it may be gibberish to the masses.
Sunday, January 14, 2007

Warm hands and feet

Things have been in high production mode here at Chez One Potato. This weekend I finished the Boy's socks and the Anemoi Mittens.

First, the mittens. I think I've established that I'm quite pleased with these. I blocked the second one yesterday and my goodness Koigu grows when wet - I got very concerned because the sodden blocking mitten was about 1/2" longer than it's previously blocked mate. I got so nervous, in fact, that I reblocked the first mitten, only to discover it too grew (and then shrank). Thankfully, they match. Not much else to say, except that I took them for a test run outside and they are soft and cozy. These will be going off to a friend in the mail and I'll be sad to see them leave.

Project: Eunny Jang's Anemoi Mittens
Materials: Koigu KPM purchased at Purl. Knit on size size 2 (2.75mm) Crystal Palace Bamboo DPNs. This produced a blocked gauge of about 10st/1".
Modifications: I'm not sure if this is really a mod, but I used a tubular cast on found at this tutorial rather than a regular tubular cast on. I also didn't use smaller needles for the cuff because I thought it was going to be too narrow, and I think this was the right decision for my hands.

Next, the socks. When I got to the end of sock two I discovered my stitch count was off. I made the executive decision that no one cares, since socks live in shoes, and I carried on. It was just a little error (I think I forgot to move some stitches around before starting the toe) so it didn't make a difference, or at least not one I could see. As soon as they were finished the Boy put them on and did not take them off for two days. So, I think they are a success.


Pattern: Gentleman's Fancy Socks from Nancy Bush's Knitting Vintage Socks
Yarn: Lorna's Laces in Mineshaft. The pattern led me to believe I would need 3 skeins but I used less than two.
Modifications: Substituted a short row heel. I know it's sacrilige to change a Nancy Bush sock pattern but I thought the heel flap would be uncomfortable and the Boy was already skeptical about the knitted socks.

Now that these are done I am swatching for a variety of new projects but I'll discuss later this week. However, I will show you this pile of goodness that arrived this weekend. That's the last you'll be seeing of it for a while, though, because it's for a top secret project. Stay tuned!

Monday, January 08, 2007

Potholders: Finito!

I finished my potholders! It took an age I tell you, but I love them. After my dear Boy went and got me more thread on Friday night, I ran out again on Sunday and had to go back to the City to procure yet another spool. Quilting is quite a thread-consuming activity. There were definitely some hiccups along the way for Potholder 1 but things improved with Potholder 2 - I think I only ripped one seam and all of the sewing went a lot more smoothly. I basically assembled all of Potholder 2 on Sunday plus finished the binding on Potholder 1. I have become much better friends with the sewing machine through this project. Apologies in advance for the poor artificially-lit pictures; it was dark when I finished last night and when I left for work this morning.


Pattern: Square Pot Holder from Amy Butler's In Stitches.
Materials: Fabric, thread and advice from Purl.
Modifications: I hand-finished the bias edging on the front of the potholders. The book has you machine-sewing top-stitching around the edging but this resulted in a really messy finish for me and made the entire potholder look sloppy. I talked to the lovely ladies of Purl and they suggested blind stitching down the edge. This came out beautifully (apart from some slight puckering which I can live with). The only issue, which they warned me about, was that it took f...o...r...e...v...e...r - about 6 hours of hand stitching. My hands actually ached last night. But it was well worth it - they look delightful!

Things that need improving: I am not much of a sewing perfectionist yet. So, there are some wonky seams and it turns out one potholder is not quite square due to some aggressive trimming in an effort to get the edging in place. The mitered corners are also a small disaster, but they look neat and clean, if not exactly miter-y. Overall, I am quite pleased with them and can't really believe I made them! I especially love the quilting.

While at Purl I also picked up a 2x2 inch Weavette. I don't like having a stash and make every effort not to keep one around. All told I think I have stored away yarn for three pairs of socks, one baby sweater and two adult sweaters (both of which were started and ripped for various reasons) plus the odd gifted skein here and there. However, I am quickly amassing a vast number of leftover oddballs and they are stressing me out. I thought I might try my hand at weaving some of these into little squares and finding some productive use for them. Suggestions welcome.

I also made some serious progress on Anemoi #2 and the Boy's Socks. I hope to knock the socks off this week, assuming I can stay awake on the train to work on them.

***
PS: To answer a question on yarn dominance in the mitten, if you click on the palm picture from my last post to make it big, you can see the blue is kind of "absorbing" the white. The white stitches are supposed to make clear diagonal lines across the palm and instead they are like dotted lines. Also take a look at Tres Chic Veronique's mittens - she does a good job of explaining the issue and she has some helpful pictures. As Ann Feitelson explains in her book The Art of Fair Isle Knitting, you are meant to keep the background color in your right hand and the contrast color in your left. This allows for the proper color to dominate. All I know is I do it the other way around and in finely detailed areas the contrast tends to get consumed by the background. Make sort of sense?